Where to start
The Notification functionality is a set of triggers that are periodically and automatically executed by our system in your application according to the rules set by your application admin. The corresponding person (e.g. your application users) can be informed about any issues or anomalies that happened in the application.
How to set these rules?
If you have already signed up and added all applications you wanted, you can set notifications.
1. After signing in, go to Settings > Notifications.

Path to Notifications
2. On the Notifications pane you can study, edit, delete the old notifications, or create new ones.
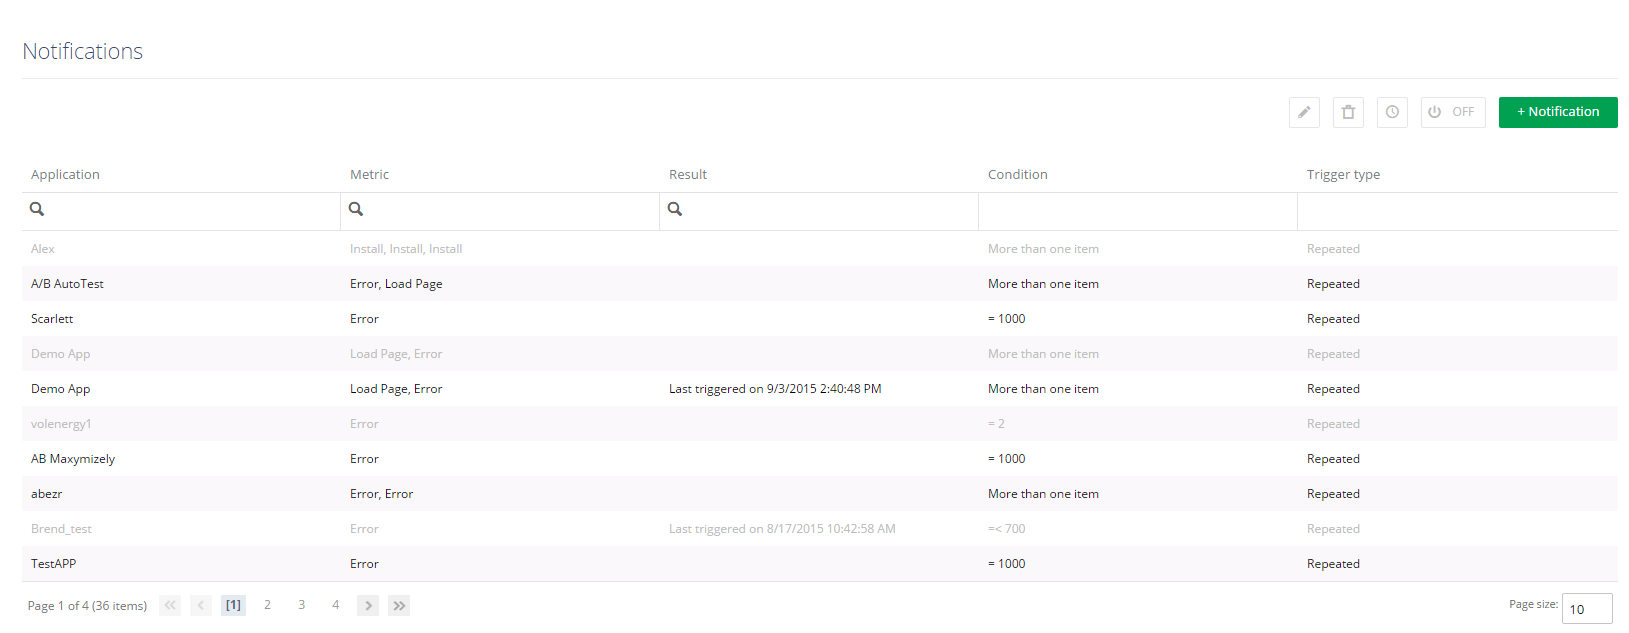
Notification Menu
3. To create a new notification, click +Notification.
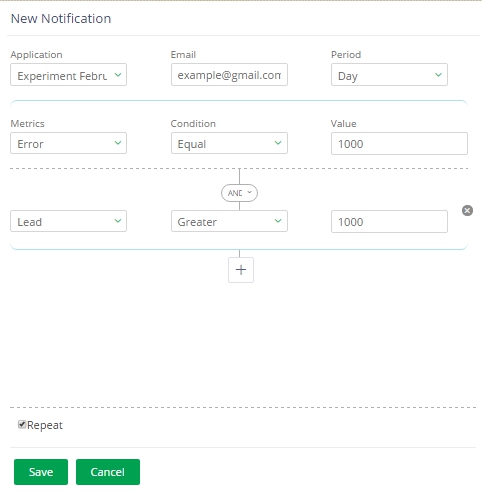
New Notification Adding
a. Select Application from the drop-down list.
b. Enter Email(s) you want your Notifications to be addressed to.
c. Select Period your event(s) should be tracked for.
d. Select Metric of your event(s).
e. Select Condition on which the rule should work out.
f. Enter Value on which the rule should work out.
4. Click + if you want to add an additional rule(s) to the application you’ve chosen.
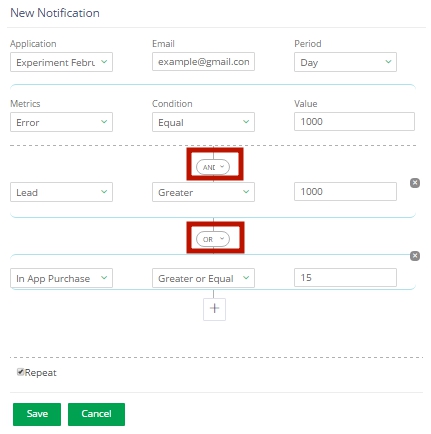
Additional Rule Adding
5. Click Save (or Cancel if you changed your mind).
6. Find your new notification on the updated pane.
You can do the following actions with several triggers simultaneously:
• Delete
• On/Off (depends on the corresponding status of the selected trigger)
The default status of your trigger is On. Buttons Edit and History are disabled if you’ve selected several triggers at the same time. You can select several triggers with a mouse or Shift, or Ctrl keys.